How to Visualize Your Dream Keyboard Build with AI
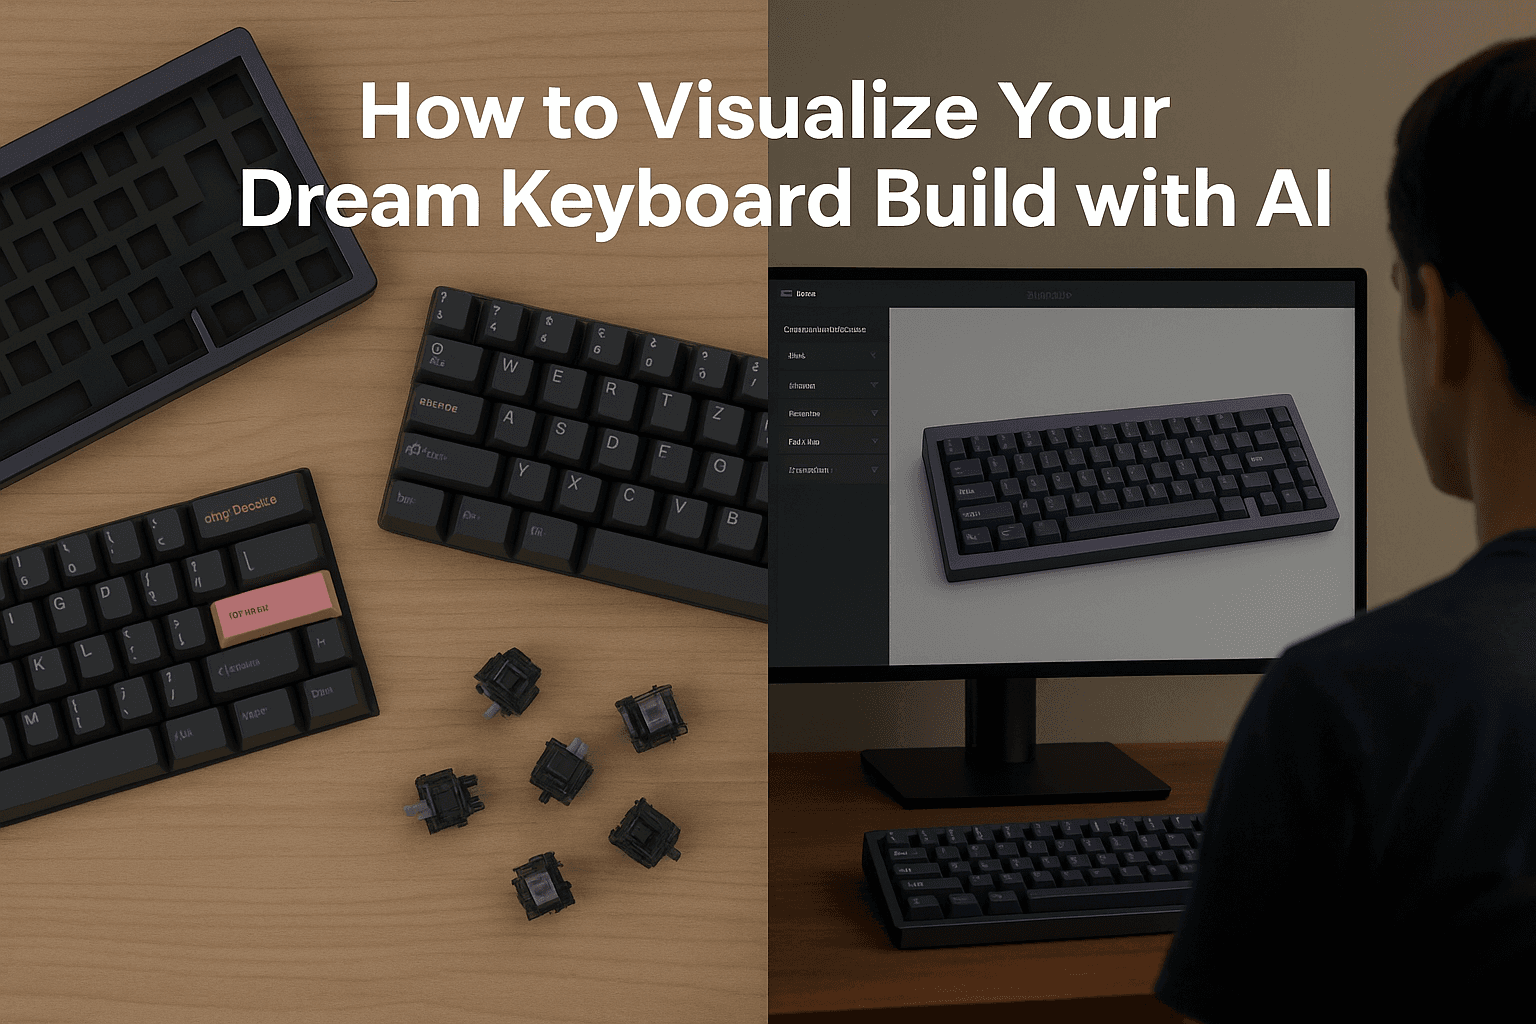
Learn how to use SwapKey's AI keyboard visualizer to see your custom keyboard build before you buy—a step-by-step tutorial for making confident purchasing decisions and avoiding expensive mistakes.
You've been scrolling through r/MechanicalKeyboards for hours, saving build photos and bookmarking group buys. You've got a list of components you love—that beautiful GMK Dracula set, the sleek Tofu65 case, maybe some Gateron Oil Kings. But here's the problem: will they actually look good together? You're about to spend $400+ on this build, and the group buy closes in three days. How do you know if those purple legends will pop against that dark case, or if the whole thing will look washed out?
This is where most keyboard enthusiasts hit a wall. Unlike buying a complete keyboard, building a custom means visualizing something that doesn't exist yet. You're making expensive commitments based on product photos, other people's builds (which never have your exact component combination), and imagination. One wrong choice and you're stuck with a $150 keycap set that clashes with your case for the next two years.
Enter SwapKey, Duckeebs' AI-powered keyboard visualizer. This tool solves the exact problem every custom keyboard builder faces: seeing your build before you buy. In this comprehensive tutorial, I'll walk you through exactly how to use SwapKey to visualize your dream keyboard build, make confident purchasing decisions, and avoid expensive mistakes.
What Is SwapKey and Why Do You Need It?
SwapKey is an AI keyboard visualizer that generates photorealistic renders of custom keyboard configurations. Instead of relying on mental gymnastics to imagine how GMK Botanical would look on a Navy Tofu60, you can see it instantly. The tool uses advanced AI to combine different components—cases, keycaps, switches (if visible), desk mats, and accessories—into cohesive build visualizations.
Here's why this matters:
- Group Buy Confidence: Group buys require commitment months in advance. SwapKey lets you see the final result before clicking "confirm order"
- Budget Optimization: Visualize multiple configurations to find the best aesthetic value for your budget
- Color Matching: Stop guessing if that beige keycap set works with your gray case
- Design Iteration: Try dozens of combinations in minutes instead of hours of research
- Community Sharing: Get feedback on your planned build before purchasing
Think of it as a keyboard keycap generator meets design tool—but instead of basic mockups, you get AI-generated photorealistic renders that show exactly how your components work together.
Getting Started: Accessing SwapKey
Step 1: Navigate to the Tool
Head to duckeebs.com/swapkey. You don't need an account to start visualizing—the tool is free and immediately accessible.
Step 2: Understand the Interface
The SwapKey interface is divided into three main sections:
- Component Selection Panel (left side): Where you choose your keyboard components
- Preview Canvas (center): Where your AI-generated visualization appears
- Options & Settings (right side): Additional customization controls
The workflow is simple: select components → generate render → evaluate → iterate.
 The SwapKey interface showing the three main sections: component selection, preview canvas, and customization options
Step-by-Step Tutorial: Building Your First Visualization
Let's walk through a complete build visualization from start to finish. I'll use a popular combination that many beginners consider: a budget-friendly 65% build with a mid-tier keycap set.
Step 1: Choose Your Keyboard Case
Start with the foundation—your keyboard case. This decision influences everything else because the case color and material set the aesthetic direction.
For our example build:
- Case: Tofu65 in Dark Purple (E-White is also popular)
- Layout: 65% (function keys + arrow keys without numpad)
How to select in SwapKey:
- Click the "Case" dropdown in the Component Selection Panel
- Filter by layout size (65%)
- Browse available cases or search "Tofu65"
- Select your preferred color variant
Pro Tip: If you're unsure about case color, start with neutral options like E-White, Black, or Gray. These work with virtually any keycap set and give you the most flexibility in your visualization journey.
Step 2: Select Your Keycap Set
This is where personality enters your build. Keycap sets define the visual identity of your keyboard.
For our example:
- Keycap Set: GMK Dracula
- Profile: Cherry profile (standard GMK)
- Material: ABS double-shot
Selection process:
- Navigate to the "Keycaps" section
- Use the search function: type "GMK Dracula" or browse by color (purple/pink)
- Click your chosen set
- The preview will update, but you haven't generated the AI render yet
Understanding keycap parameters:
- Profile: The shape/height of keycaps (Cherry, SA, DSA, MT3, etc.)
- Material: ABS (smooth, develops shine) vs PBT (textured, shine-resistant)
- Colorway: The color scheme and legend style
Common Mistake to Avoid: Don't judge the combination yet—you're seeing a basic overlay, not the final AI-generated visualization. The magic happens in the next step.
Step 3: Generate Your First AI Render
Now comes the exciting part—seeing your build come to life.
Generation process:
- Review your selected components in the summary panel
- Click the large "Generate Visualization" button
- Wait 10-30 seconds for AI processing
- Your photorealistic render appears in the preview canvas
What you're seeing: The AI has created a cohesive image showing:
- Accurate case color and finish (anodization, coating, etc.)
- Keycap colors with proper lighting and shadows
- Realistic spacing and proportions
- Professional photography-style presentation
Evaluation checklist:
- Do the colors work together or clash?
- Does the overall aesthetic match your vision?
- Are there any unexpected color combinations you dislike?
- How does it compare to your mental image?
For our GMK Dracula on Dark Purple Tofu65 example, you'll see rich purple legends against dark keycaps, complemented by the deep purple case. The AI render shows how the pink accent keys pop against the darker elements.
Step 4: Iterate and Refine
This is where SwapKey's real power emerges. Don't settle for your first visualization.
Try these variations:
- Same set, different case color: Keep GMK Dracula but try it on E-White or Black Tofu65
- Same case, different set: Keep the Dark Purple case but try GMK Botanical or GMK Laser
- Budget alternatives: Swap GMK sets for PBT clones or in-stock sets
Workflow for iteration:
- Change one component at a time
- Generate new render
- Compare side-by-side (screenshot or use browser tabs)
- Make notes about what works and what doesn't
Real example from our test:
- Original: GMK Dracula + Dark Purple Tofu65 = Too much purple, lacks contrast
- Iteration 1: GMK Dracula + E-White Tofu65 = Better, but common combination
- Iteration 2: GMK Dracula + Black Tofu65 = Perfect—dark case makes colors pop, unique look
Pro Tip: Generate at least 5-7 variations before making final purchasing decisions. Your first choice is rarely your best choice.
Step 5: Add Context with Desk Setup
Keyboards don't exist in isolation—they're part of your workspace. SwapKey lets you add desk mats and accessories to see the complete picture.
Adding desk mats:
- Navigate to "Accessories" section
- Select "Desk Mat"
- Choose complementary or matching designs
- Generate new render with complete desk setup
For our build:
- Desk Mat: Randomfrankp x NK_ Desk Mat in Black or GMK Dracula desk mat for theme consistency
- Result: Shows how the keyboard integrates into your overall workspace aesthetic
Why this matters: A keyboard that looks amazing in isolation might disappear on certain desk mats. Or a bold keyboard might overwhelm a busy desk mat pattern. Seeing the complete setup helps you make holistic design decisions.
Step 6: Test Lighting Conditions
SwapKey offers different lighting presets to show how your build appears in various conditions.
Available lighting options:
- Natural Light: Simulates daylight/window lighting
- Warm Indoor: Standard desk lamp/warm LED
- Cool Studio: Professional photography lighting
- RGB Accent: With RGB underglow or backlighting
Testing process:
- Select your finalized component combination
- Use the "Lighting" dropdown in settings
- Generate renders in each condition
- Evaluate color accuracy and visibility
Key insight: Some colorways look dramatically different under warm vs cool lighting. GMK Mizu appears more vibrant under cool lighting, while GMK Camping shines under warm tones. Test both if you work in different lighting conditions throughout the day.
Practical Use Cases: When to Use SwapKey
Use Case 1: First-Time Builder Making Group Buy Decisions
Scenario: You've never built a custom keyboard, and GMK Botanical is in group buy for one more week. It's $135, and you're not sure if it'll work with your planned build.
SwapKey workflow:
- Input your planned case (e.g., GMMK Pro White Ice)
- Add GMK Botanical
- Generate visualization
- Try 3-4 alternative keycap sets in the same price range
- Compare renders side-by-side
- Make informed decision based on visual preference
Outcome: Confidence in your $135+ purchase decision, or discovery of a better alternative you hadn't considered.
Use Case 2: Budget Optimization
Scenario: You have $300 total budget. Should you spend $200 on the case and $100 on keycaps, or $150/$150?
SwapKey workflow:
- Create "expensive case" version: Mode65 ($200) + Budget PBT set ($100)
- Create "balanced" version: QK65 ($150) + GMK set ($150)
- Generate both visualizations
- Evaluate which combination delivers better aesthetic value
- Consider typing experience alongside visual appeal
Outcome: Data-driven allocation of your budget based on actual visual results, not speculation.
Use Case 3: Matching Existing Components
Scenario: You already own GMK Olivia Dark, and you're buying a new case. Which color works best?
SwapKey workflow:
- Select GMK Olivia Dark as constant
- Iterate through case colors: Black, E-White, Navy, Burgundy, Pink
- Generate all variations
- Evaluate color harmony and contrast
- Check desk mat compatibility with each option
Outcome: Perfect case selection that complements your existing investment instead of clashing with it.
Use Case 4: Gift Planning
Scenario: You're buying a keyboard as a gift. You know they like blue themes but don't know their exact preferences.
SwapKey workflow:
- Create multiple blue-themed builds
- Generate visualizations with different intensities (subtle to bold)
- Test different case sizes (60%, 65%, 75%)
- Save 2-3 finalists
- Share with mutual friend or ask recipient for "aesthetic preference" without revealing it's a gift
Outcome: Thoughtful gift that matches recipient's taste, verified through visual evidence.
Advanced Tips: Getting the Most from SwapKey
Tip 1: Use the Screenshot Compare Feature
Don't rely on memory when comparing builds.
Best practice:
- Generate visualization
- Screenshot the render
- Create a comparison folder
- Label each screenshot with components (e.g., "GMK-Dracula_Tofu65-Purple.png")
- View all screenshots side-by-side using image viewer
This systematic approach prevents "did I already try that combination?" confusion.
Tip 2: Follow the 60/30/10 Color Rule
Professional designers use this color distribution rule:
- 60%: Dominant color (usually case)
- 30%: Secondary color (main keycap color)
- 10%: Accent color (accent keycaps, cable, artisans)
In SwapKey: Test whether your combination follows this rule by evaluating the AI render. Builds that maintain this balance typically look most cohesive.
Tip 3: Consider Color Psychology
Different colors evoke different moods:
- Blue/Cyan: Calm, professional, focused
- Purple/Pink: Creative, playful, bold
- Green/Beige: Natural, relaxed, vintage
- Black/White: Minimalist, sleek, timeless
- Red/Orange: Energetic, attention-grabbing, warm
Use SwapKey to ensure your color choices align with your workspace mood.
Tip 4: Test Monochromatic vs High-Contrast
Generate two versions of your build:
- Monochromatic: Case and keycaps in similar color family (e.g., gray case + dark gray keycaps)
- High-contrast: Opposite colors (e.g., black case + white keycaps)
Many builders discover their preference through AI visualization rather than trial and error.
Tip 5: Validate Against Real Build Photos
After generating your SwapKey visualization:
- Search Reddit/Instagram for similar builds
- Compare the AI render to real photos
- Assess accuracy and identify any discrepancies
- Adjust expectations accordingly
The AI is highly accurate, but lighting and photography conditions in real builds may vary.
Common Mistakes and How to Avoid Them
Mistake 1: Deciding Too Quickly
The problem: Generating one visualization and immediately purchasing components.
The solution: Set a personal minimum of 5 variations before making any purchase. Often, variation #4 or #5 reveals a superior combination you hadn't considered.
Mistake 2: Ignoring Desk Mat Integration
The problem: Perfecting the keyboard in isolation without considering where it will live.
The solution: Always generate at least one render with your actual desk mat (or planned desk mat). A keyboard that looks amazing on black might disappear on a dark desk mat.
Mistake 3: Over-Matching
The problem: Choosing keycaps that exactly match case color, resulting in a blob of uniform color.
The solution: Aim for complementary contrast. If your case is navy, try white or beige keycaps rather than matching navy keycaps. The SwapKey renders will clearly show when you've over-matched.
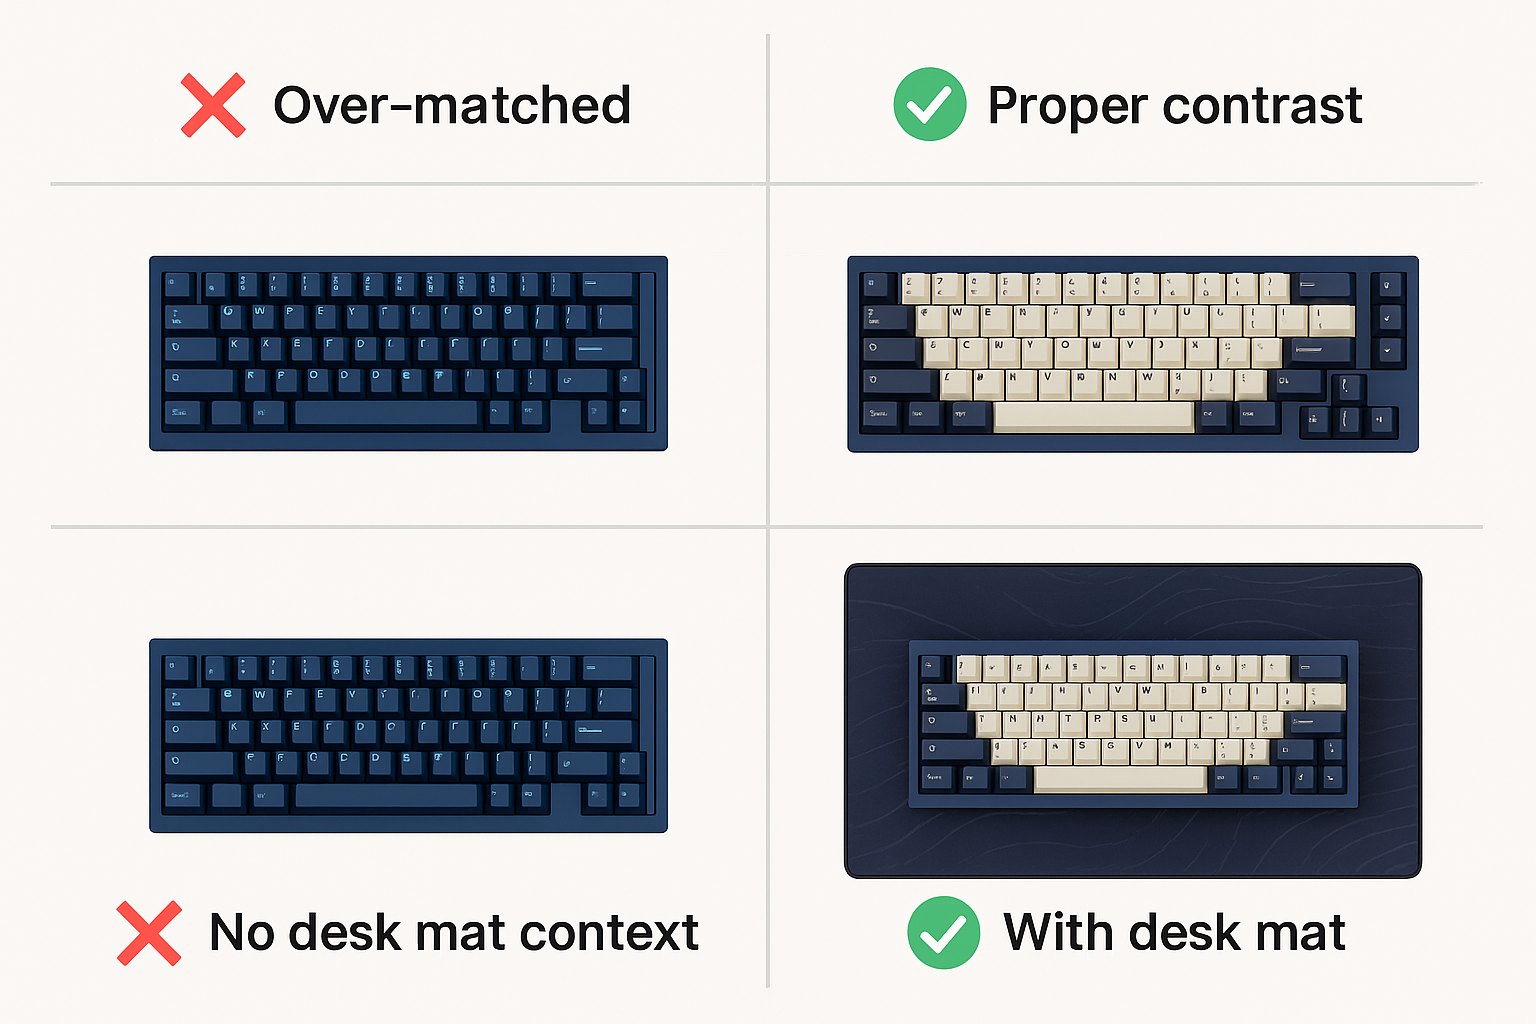 Side-by-side comparison showing common visualization mistakes: over-matching colors (left) vs. proper contrast (right)
Mistake 4: Forgetting About Legends
The problem: Focusing solely on base colors and ignoring legend color/style.
The solution: In SwapKey, zoom in on the renders to evaluate legend visibility and style. Light legends on light keycaps (even different shades) can have poor readability.
Mistake 5: Skipping Lighting Variations
The problem: Only viewing one lighting condition and being surprised when real-world colors look different.
The solution: Test at least two lighting presets—natural and warm indoor. Your keyboard will experience both throughout the day.
Building Confidence Through Visualization
One of SwapKey's most valuable benefits is psychological: confidence in your purchasing decisions.
The confidence framework:
- Visual Verification: You've seen the end result
- Comparison Data: You've tested alternatives
- Context Awareness: You've seen it in your workspace setup
- Community Validation: You can share renders and get feedback
- Risk Reduction: You've eliminated obvious mismatches
This confidence translates to:
- Faster decisions: No more week-long deliberations
- Fewer regrets: Visual proof reduces buyer's remorse
- Better planning: Understanding what works guides future purchases
- Community contributions: You can help others with your validated combinations
Sharing Your Designs and Getting Feedback
SwapKey renders are perfect for community feedback.
Sharing workflow:
- Generate your top 2-3 build variations
- Export/screenshot the renders
- Post to r/MechanicalKeyboards or keyboard Discord servers
- Ask specific questions: "Which combination has better contrast?" or "Does the pink overwhelm the build?"
- Incorporate feedback and regenerate if needed
Effective sharing template:
Title: "Help me choose between these 3 Tofu65 builds [SwapKey renders]"

Build A: GMK Dracula + Black Tofu65
Build B: GMK Botanical + E-White Tofu65
Build C: GMK Laser + Purple Tofu65

Budget: $400 total
Use case: Daily driver for programming
Lighting: Warm indoor desk lamp

Which combination has the best contrast and won't fatigue during long coding sessions?
This approach gets targeted, useful feedback instead of generic "looks nice" comments.
 Example of sharing SwapKey renders on Reddit to gather community feedback before making purchase decisions
Integration with Duckeebs Ecosystem
SwapKey isn't standalone—it integrates with the broader Duckeebs platform.
Key integrations:
- Group Buy Tracker: See SwapKey visualizations directly on group buy listings
- Interest Check Directory: Visualize IC keyboards before they even enter GB
- Component Database: All keyboards, cases, and keycap sets in SwapKey are linked to detailed specs
- Community Builds: Browse real builds and generate similar combinations in SwapKey
Workflow example:
- Browse group buys to find interesting sets
- Click "Visualize in SwapKey" button
- Auto-populate the keycap set
- Add your planned case
- Generate render
- Make informed GB join decision
This ecosystem approach means you're not just visualizing—you're making data-informed decisions backed by community data, availability information, and real-world pricing.
Real-World Success Stories
Case Study 1: The Budget Builder
Sarah had $250 for her first build. She initially planned:
- KBD67 Lite ($109)
- GMK Clone Olivia ($45)
- Gateron Yellows ($20)
- Cable + accessories ($76)
After SwapKey visualization, she discovered the light pink case clashed with Olivia's peachy tones. She iterated and found:
- Same KBD67 Lite in transparent ($109)
- GMK Clone Botanical ($40)
- Same switches ($20)
- Better aesthetic, saved $5 for better cable ($81)
Result: Superior aesthetic, stayed in budget, avoided expensive mistake.
Case Study 2: The Group Buy Decision
Marcus was torn between joining GMK Camping R2 ($140) or waiting for GMK Birch ($155). He used SwapKey to visualize both on his Navy Tofu65.
Renders revealed:
- GMK Camping: Excellent contrast, warm vintage aesthetic
- GMK Birch: Colors blended too much with navy case, lost definition
Decision: Joined Camping GB with confidence, saved $15 and got better aesthetic match.
Case Study 3: The Gift Giver
Emma was buying a keyboard gift for her partner who loved minimalist design. She tested five builds in SwapKey:
- All-black configurations
- White/beige combinations
- Minimal accent color variations
The renders showed that pure monochrome looked flat in their bright home office. She chose subtle beige accents on white base, which the renders proved added depth without overwhelming minimalist aesthetic.
Result: Gift recipient loved it, specifically commenting on the "perfect balance."
Your Next Steps: Start Visualizing Today
You now have everything you need to transform how you approach custom keyboard building. No more expensive guesswork, no more buyer's remorse, no more "I wish I had seen this first."
Immediate action plan:
- Visit SwapKey right now
- Input your current planned build (or dream build)
- Generate your first visualization
- Create 4-5 variations to explore alternatives
- Screenshot your favorites for comparison
- Share with the community for feedback
- Make confident purchasing decisions backed by visual evidence
Start with these popular combinations to learn the tool:
- GMK Olivia Dark + E-White Tofu65
- GMK Botanical + Black Brutal60
- GMK Dracula + Purple Tofu65
- GMK Laser + Cyberdeck case
- ePBT Ivory + Beige KBD67 Lite
Each of these has proven visual appeal and will help you understand how the keyboard visualizer works.
Beyond Visualization: The Complete Keyboard Journey
SwapKey is your starting point, but Duckeebs offers tools for every stage:
- Planning Phase: Use SwapKey for visualization
- Shopping Phase: Browse group buys with integrated renders
- Research Phase: Check interest checks for upcoming opportunities
- Community Phase: Share builds, get feedback, help others
- Optimization Phase: Return to SwapKey when planning upgrades
This comprehensive approach means you're not just building a keyboard—you're making informed decisions at every step, backed by community data and powerful visualization tools.
Final Thoughts: Visualization Changes Everything
The mechanical keyboard hobby has always been about personal expression through customization. But until now, that expression required expensive trial and error, countless hours researching other people's builds, and hoping your mental image matched reality.
SwapKey transforms this process. It gives you a keyboard keycap generator that shows exactly what you're getting. It provides the confidence to try bold combinations you might have dismissed. It saves you from expensive mistakes while opening doors to creative possibilities.
Whether you're planning your first $200 budget build or your tenth enthusiast-grade creation, visualization through SwapKey makes the process faster, cheaper, and more enjoyable. You spend less time worrying and more time excited about your upcoming build.
So stop imagining. Stop guessing. Stop hoping it'll look good. Head to SwapKey and see exactly what your dream keyboard will look like—before you spend a single dollar.
Your perfect keyboard build is waiting to be visualized. Get started today.